Streaming is a module that is located at the bottom left.
Click---> "Streaming"
Clicking on Streaming will display the “Manage” tab. Click there.
Click---> Manage

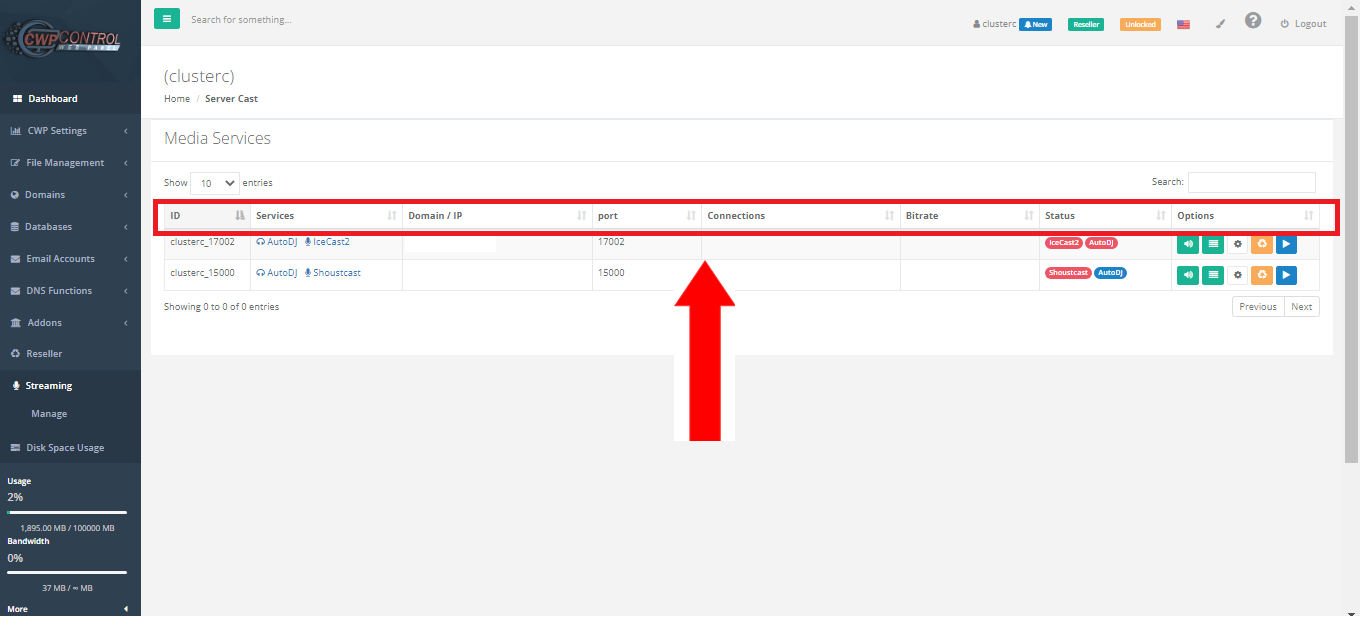
In this module you can manage different streaming services of different types (Shoutcast and IceCast).
Here you can see a detailed list with:
- ID: Unique identification name
- Services: Created for the user and active from Admin, can be ShoutCast or IceCast
- Domain/IP
- Port: Related to User ID and Name
- Connections
- Bitrate: Sound quality when transmitting, linked to the packages purchased for the user in the Admin section
- Status: Specifies the active service
- Options: For each active service
On the right side it will have characteristic colored buttons depending on the function they perform.
Among which are:
- AutoDj
- General information
- Set up
- Restart IceCast
- Start ShoutCast
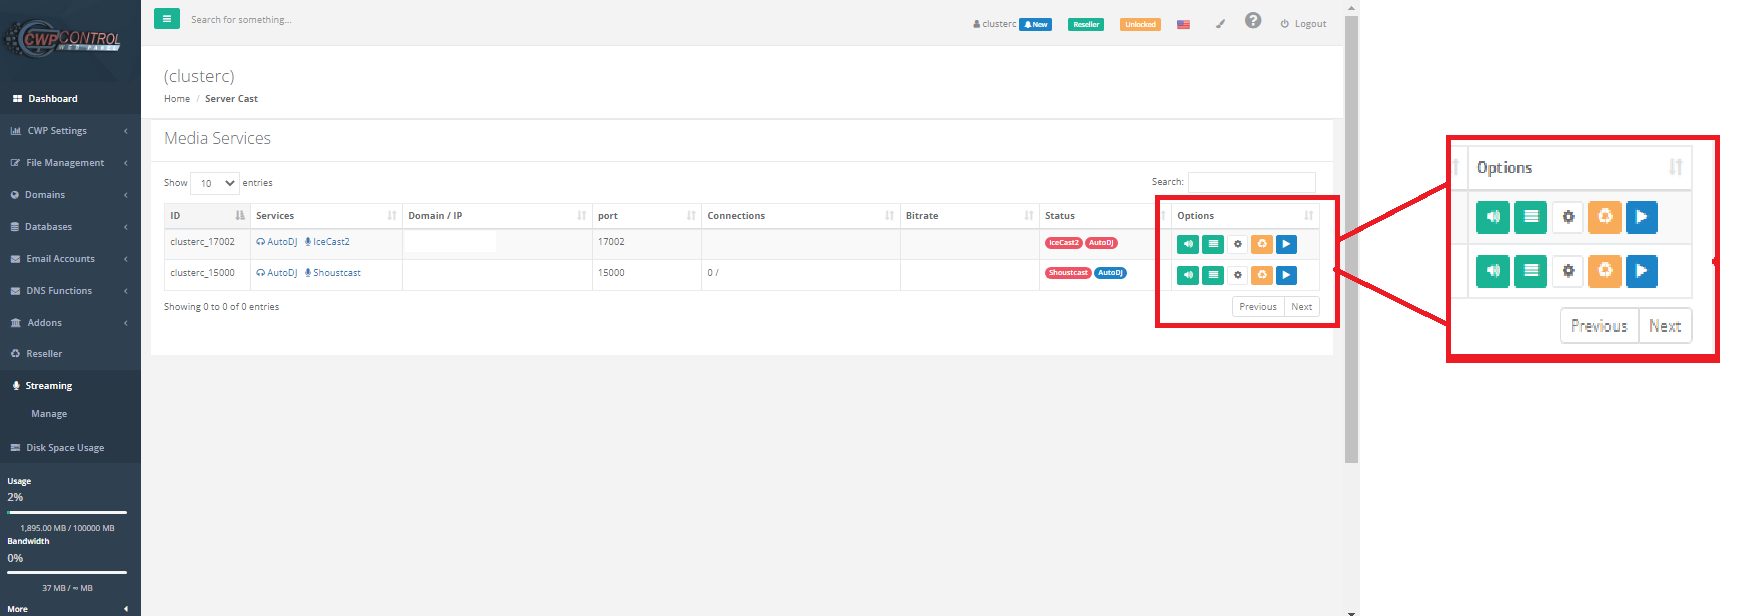
Note: The color of the status letters will match the activity that is completed.
You must Click the services (ShoutCast or IceCast) active to have more detailed functions.

Among the main options of this new accessory are:
- Services Overvier.
- Config.
- AutoDJ Rep List.
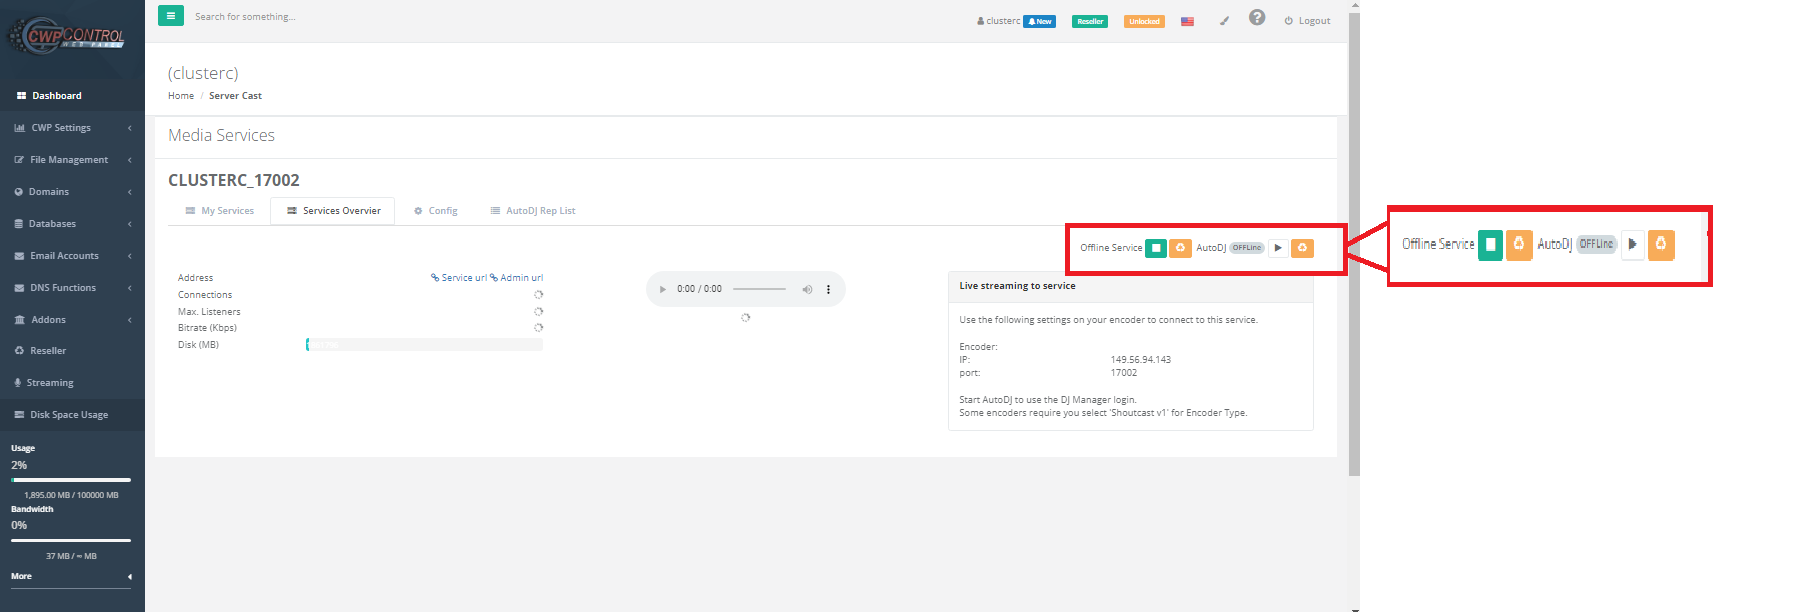
Services Overvier: It is a small desk where you can check the general characteristics of the contracted service and the status of each of the tools for this service.
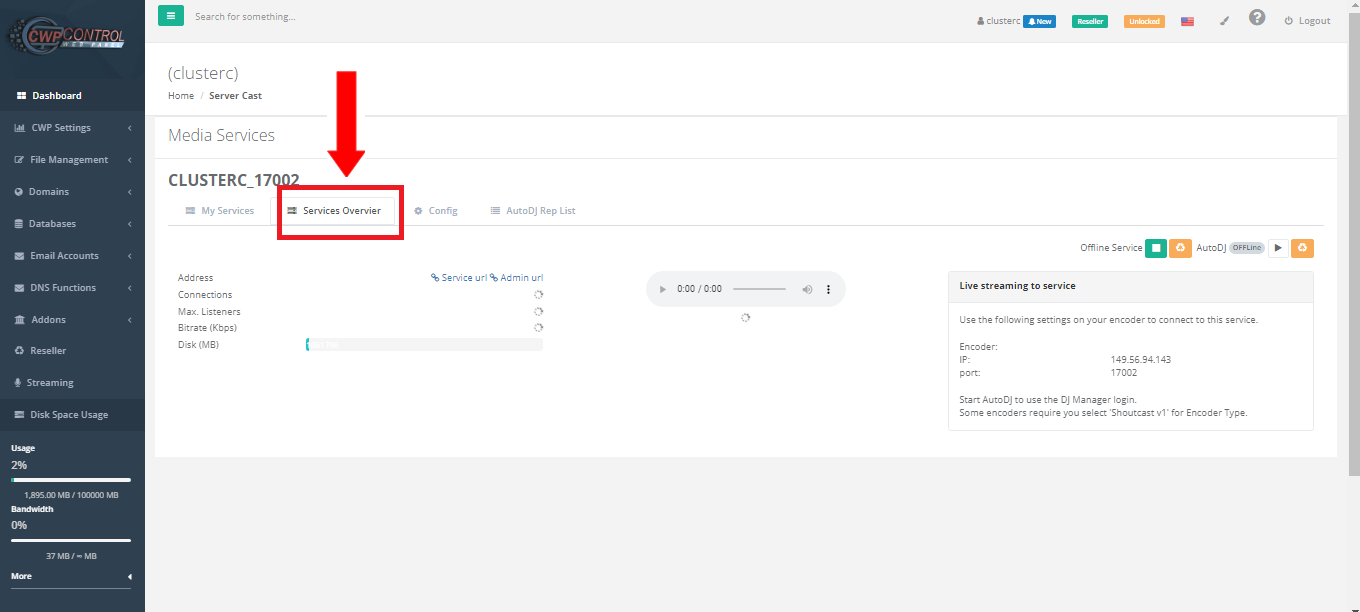
It will have options to start, stop or restart the service. You will also be able to start, stop or restart the AutoDj service.
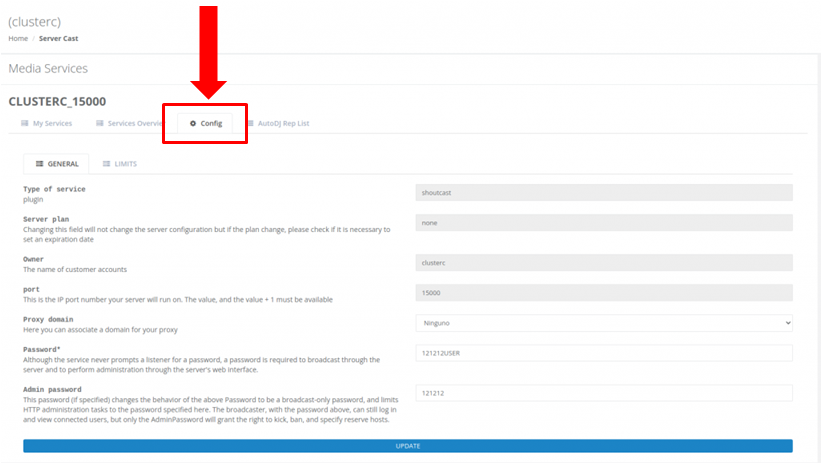
Config: In this page you will have the main options to change the password of the user (Admin / User) of the service, assign a domain name in the form of a proxy and the visualization of other characteristics.
Click---> "Config"
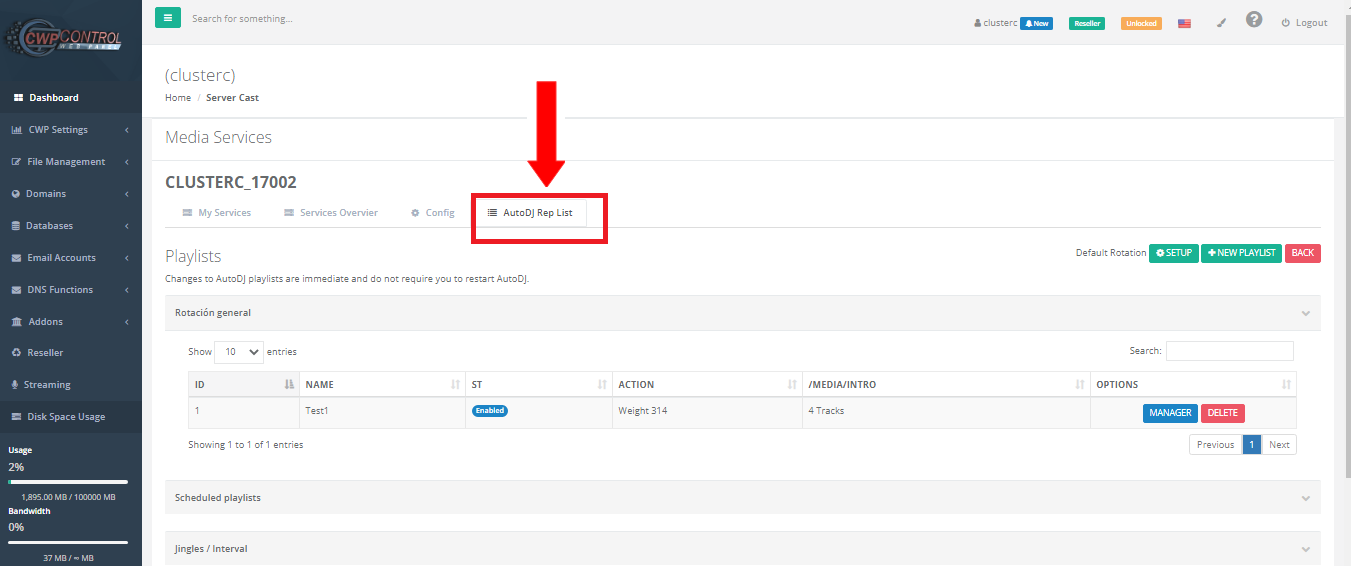
AutoDJ Rep List: This tab will be present if the AutoDJ service is Installed from the administrator, from here you can:
- Create Playlists
- Upload Audio files to your web space
- Set Auto DJ Auto Play.
Note: Changes to AutoDJ playlists are immediate and do not require you to restart AutoDJ.
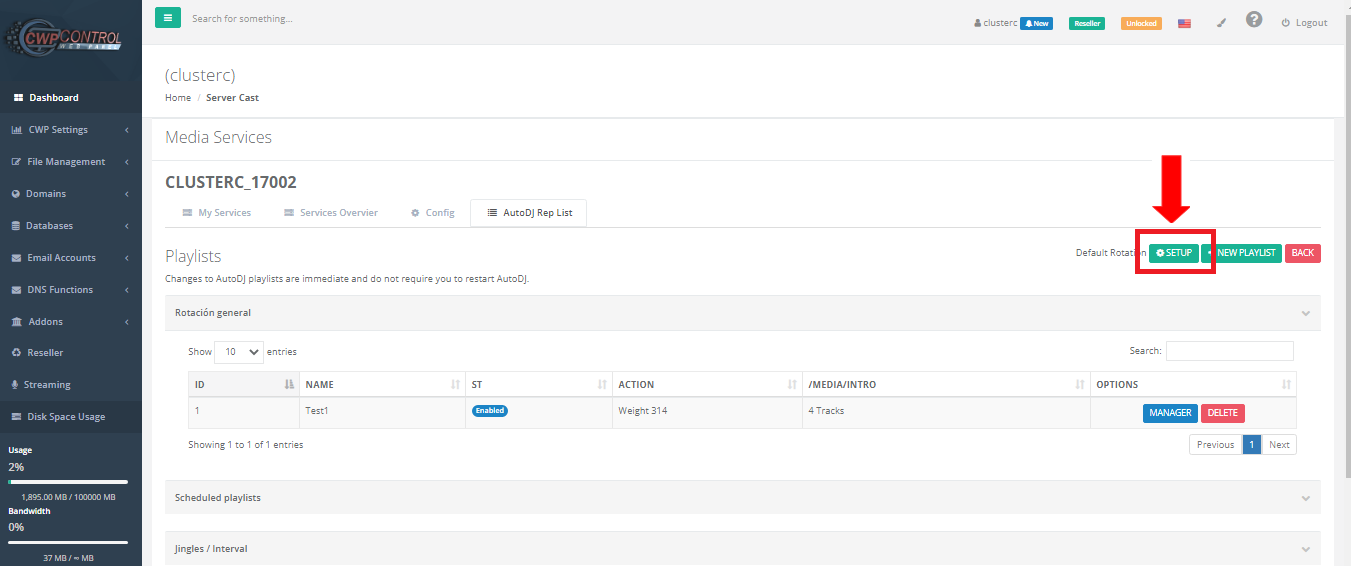
Click---> "AutoDJ Rep List"
Detailed Playlist will appear with ID, Name, ST, Action, /MEDIA/INTRO and Options.
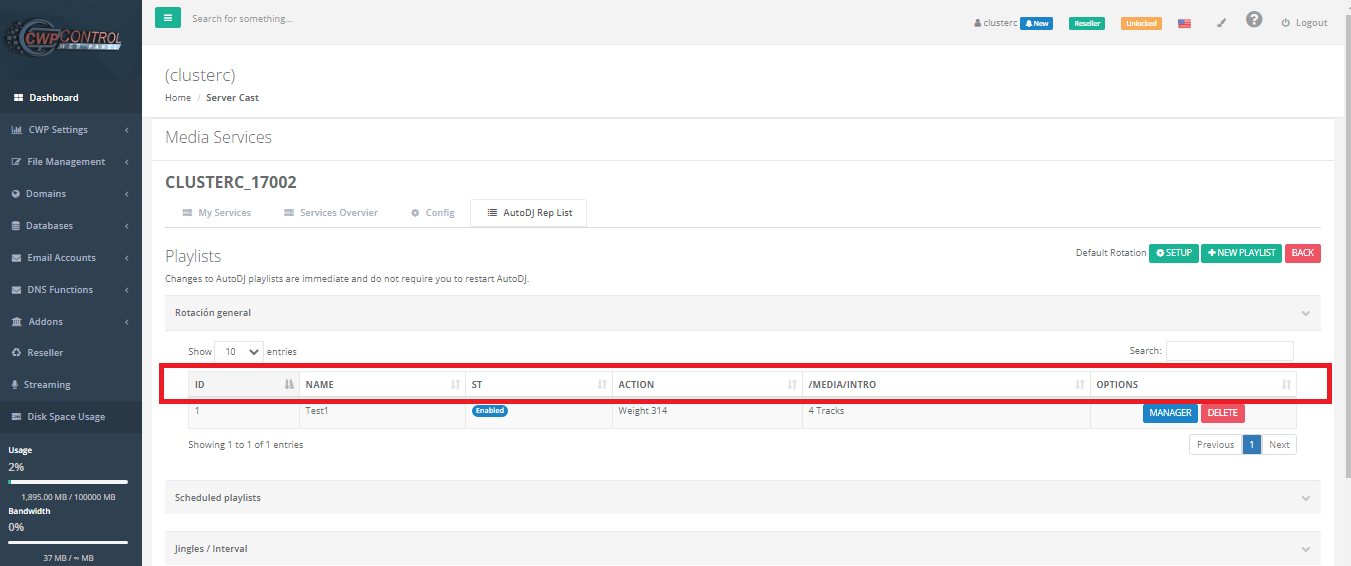
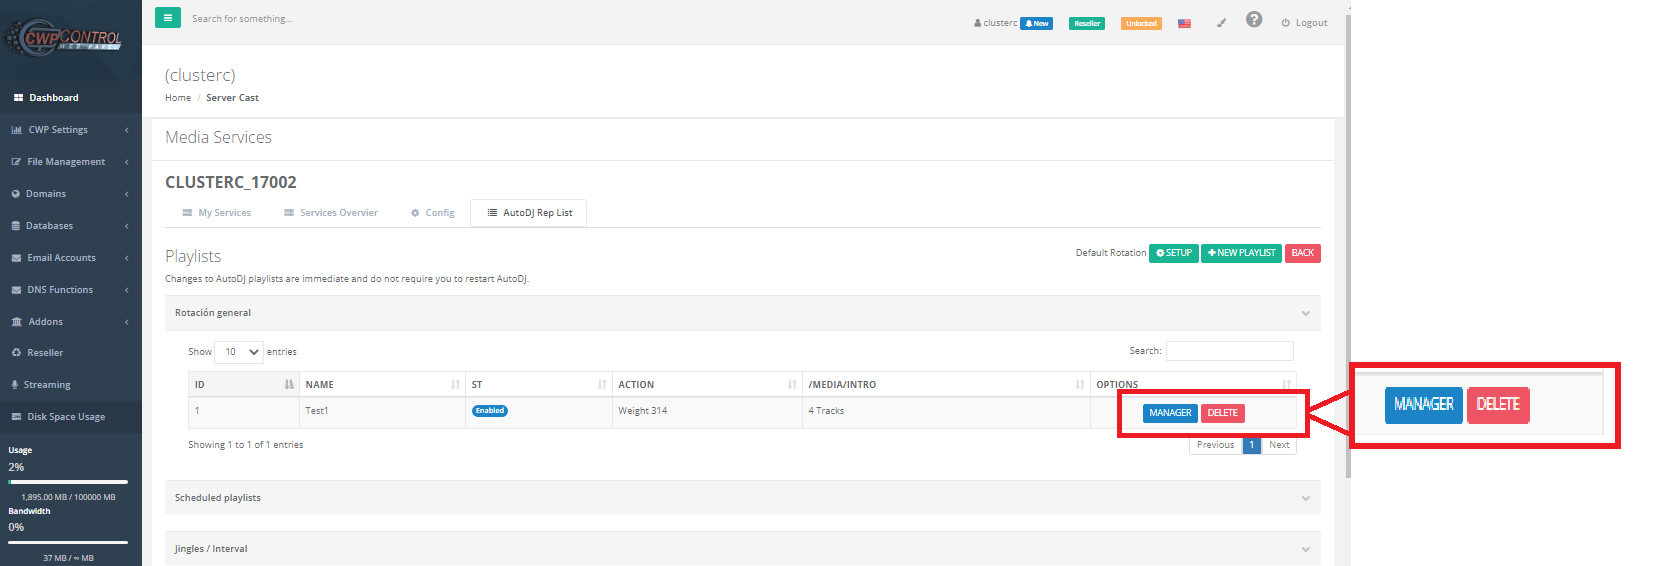
It will have Options to “Manager” and “Delete”.
Click---> SETUP
Add the requested information and Click Save.
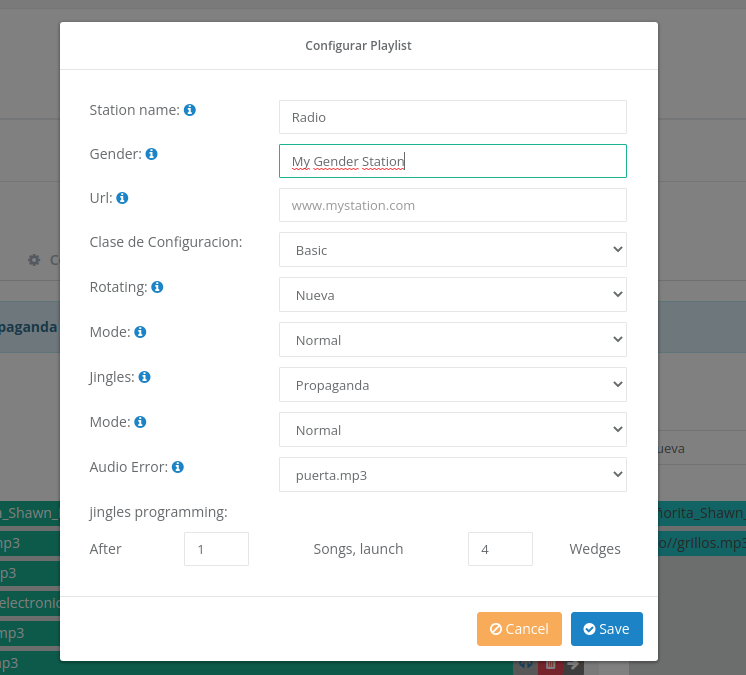
Note: It is important to specify the mp3 (audio is the one that will sound when there is no connection with AutoDj) in the “Audio Error”, if not specified, AutoDj will generate an error.
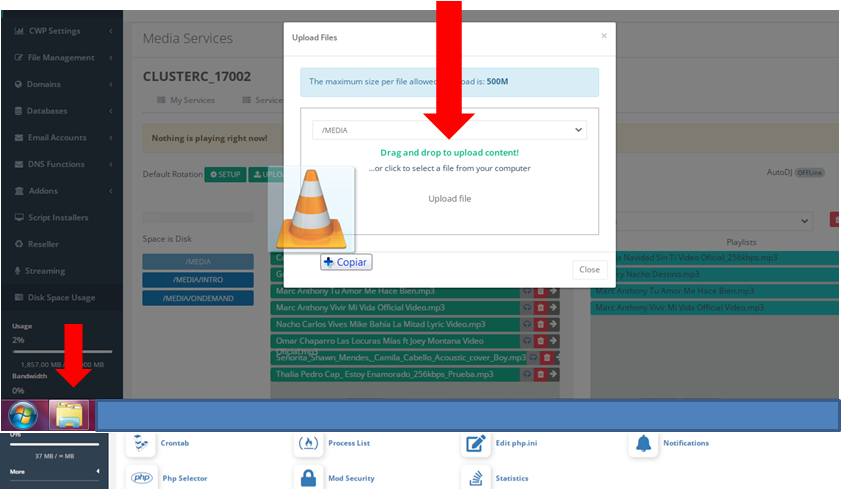
Click ---> "UPLOAD MUSIC"
Drag and drop to upload content!
…or Click to select a file from your computer Upload file.
Once the mp3 is loaded it will go directly to the list.
Note: Changes to AutoDJ playlists are immediate and do not require you to restart AutoDJ.