Log in at https://billing.example.com/<admin path>/ with the administrator you created in the installer. Then work through this list.
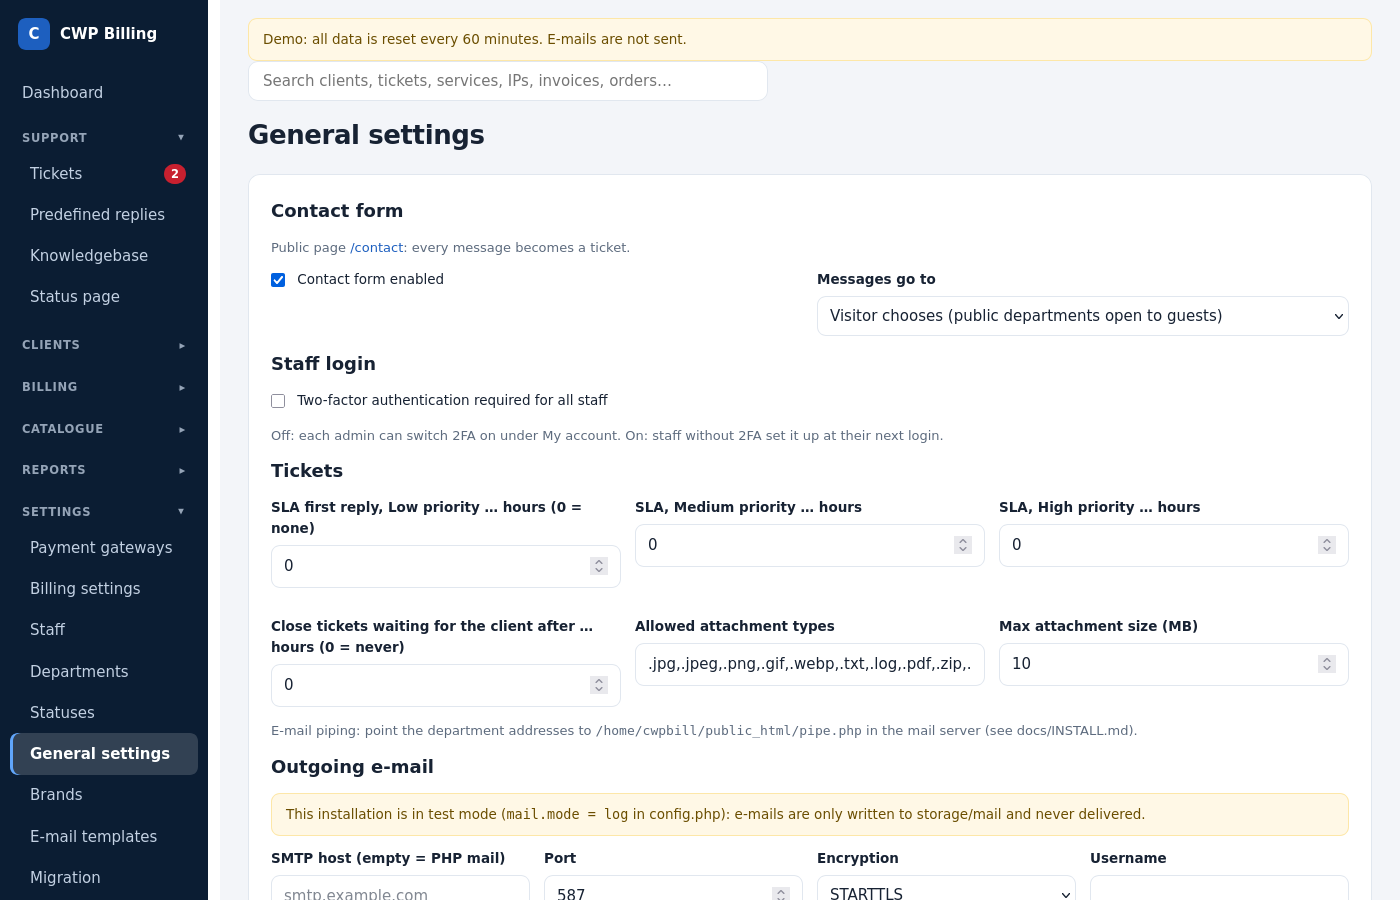
1. General settings
Settings → General settings
- Outgoing e-mail. Enter the SMTP host, port, encryption, user and password, then send a test mail. Without SMTP, the billing uses PHP
mail(). - Contact form and captcha. Choose Cloudflare Turnstile, Google reCAPTCHA v2 or hCaptcha, and the forms that use it.
- Staff login. Two-factor authentication is optional by default. Tick Two-factor authentication required for all staff to make it mandatory. Each staff member can turn on 2FA for their own login under My account.
- Tickets: SLA, auto-close and attachments.
An optional Admin area IP allowlist is under Staff.
2. Billing settings
Billing settings
- Company details for invoices. Legal name, address, tax ID, registration number, IBAN/SWIFT and the footer.
- Currency and additional currencies with exchange rates.
- Tax. The default name and rate, rules per country, and EU reverse charge (your country must be set).
- Invoice numbering. For example
{year}-{n}and the next number. - Automation. Invoice days before the due date, reminders, suspension and termination days, late fees, and the hour of the daily run. See Billing automation.
Tip. Untick Automation enabled while you test or migrate. The daily run then does nothing.
3. Payment gateways
Under Payment gateways, enter the keys for Stripe, PayPal, Skrill or bank transfer. Each gateway shows its webhook URL. See Payment gateways.
4. Servers and products
- Servers → Add server. Choose the module (CWP, cPanel, DirectAdmin, Proxmox) and enter the API access. Use Test connection.
- Connect the CWP Billing module on your CWP servers. See CWP servers and the CWP Billing module.
- Products → Add product. Set the group, the prices per billing cycle, the server group and the package. See Products and orders.
5. Support desk
- Departments: support, billing, sales and so on, each with its e-mail address. Mark which ones are public.
- Statuses and Predefined replies.
- Set up e-mail piping for the department addresses.
6. Staff
Under Staff, add staff members and roles with the permissions they need. A role can be limited to departments. See Staff, roles and security.
7. E-mail templates and the client area
- E-mail templates. Check the texts and the signature. Each template exists in every language.
- Brands, Knowledgebase and Status page (optional).
- Add your logo and colours with a theme. See Client area, themes and languages.
8. Test an order
Order a product as a test client:
- Pay with the gateway in test mode (Stripe test keys, PayPal sandbox).
- Check that the account is created on the server and that the welcome e-mail arrives.
Then delete the test client.
Moving from WHMCS?
Do the WHMCS import on a fresh installation before you create your own products and clients.